Ascent Utilities
Ascent provides a some utilities to assist users and developers. Currently, Ascent provides two main utilities:
replay: a set of programs that replays simulation data saved by Ascent or exported by VisIt to Ascent.gen_spack_env_script.py: a python program to create a shell script that loads libraries built by uberenv (i.e., spack) into the user environment.
Replay
Replay is a utility that allows the user to ‘replay’ Conduit Blueprint HDF5 files saved by Ascent or exported by VisIt (starting in version 3.0 beta) back into Ascent. Simulations often take a significant amount of time to develop into a meaningful or interesting state. Replay enables the user or developer to cherry-pick specific time steps and load them into Ascent.
Why Do I Need This?
There are several use cases for using replay:
Creating actions files
Ascent development
Algorithm development
When creating in situ actions, a common strategy for scripting actions a priori is to get a smaller representation of the simulation data a user expects to see in situ and create visualization actions that can then be applied to the full data set in situ. Replay enables the user to load data into Ascent without using a fully integrated simulation workflow.
Additionally, replay can be used for Ascent and algorithm development. Replay can load specific data sets or time steps into Ascent. With replay, loading various test cases and iterating over development cycles is straight forward.
How Do I Get Blueprint Files?
To use replay, you first need compatible data and there are two methods to obtaining it.
Using Ascent
The relay extract saves out Conduit Blueprint HDF5 files that replay consumes.
Simply add the extract to the actions in the code or actions file. The relay extract can
also sub-select the fields that are saved to reduce the total data set size. For more information see
the Relay section.
conduit::Node extracts;
extracts["e1/type"]  = "relay";
extracts["e1/params/path"] = "my_output_file_name";
extracts["e1/params/protocol"] = "blueprint/mesh/hdf5";
To do the same in an ascent actions file:
-
  action: "add_extracts"
  extracts:
    e1:
      type: "relay"
      params:
        path: "my_output_file_name"
        protocol: "blueprint/mesh/hdf5"
Using VisIt
Starting with 3.0 beta, VisIt supports exporting databases to the Conduit Blueprint HDF5 format. With this support, VisIt can serve as file format converter from any of the many supported database reader formats to the format that replay can consume.
To export in Blueprint format, select export from VisIt’s File Menu:
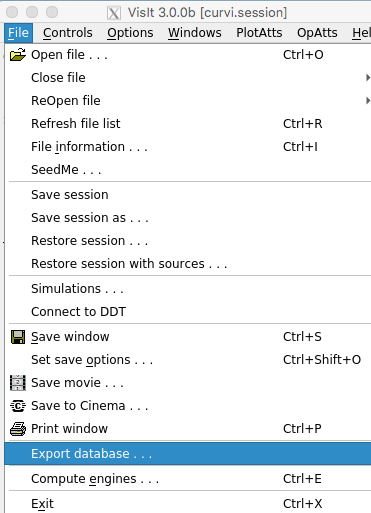
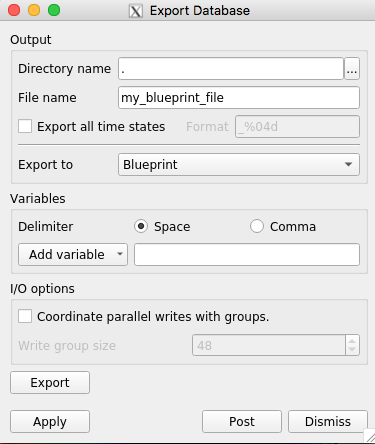
Then from the Export to drop-down, select Blueprint:
How Do I Use It?
Replay executables are created in the utilities/replay directory of the installation or build.
There are two versions of replay:
ascent_replay: a serial (non-MPI) versionascent_replay_mpi: an MPI version
The options for replay are:
--root: specifies Blueprint root file to load--cycles: specifies a text file containing a list of Blueprint root files to load--actions: specifies the name of the actions file to use (default:ascent_actions.json)--groups: specifies the for ascent_replay_mpi, specify the number of parallelin time groups the processes are split into. (default: square root of availible processes)
Example launches:
./ascent_replay --root=clover.cycle_000060.root --actions=my_actions.json
srun -n 8 ./ascent_replay_mpi --root=clover.cycle_000060.root --actions=my_actions.json
srun -n 8 ./ascent_replay_mpi --cycles=cycles_list.txt --actions=my_actions.json
The cycles files list is a text file containing one root file per line:
cat cycles_list.txt
clover.cycle_000060.root
clover.cycle_000080.root
clover.cycle_000100.root
clover.cycle_000120.root
Replay will loop over these files in the order in which they appear in the file.
Domain Overloading
Each root file can point to any number of domains. When launching ascent_replay_mpi,
you can specify any number of ranks less than or equal to the number of domains.
Replay will automatically domain overload. For example if there were 100 domains and
replay is launched with 50 ranks, then each rank will load 2 domains.
Example Actions Development Workflow
In this example, we will walk through the how to use replay to create a non-trivial actions file. This can be error prone, since the actions files are just a text file and errors won’t be reported until runtime. We will use the cloverleaf 3D proxy application as a data source.
Getting Data For Replay
We are only interested in getting a representative data set that we can iterate over quickly. Ideally, this data will have all the same fields and topologies as the full sized simulation, but with a much smaller mesh resolution.
For an Ascent install, Cloverleaf3d is located in examples/ascent/proxies/cloverleaf3d
and for an build, it’s located in examples/proxies/cloverleaf3d.
The input deck is clover.in, and if you going to run Cloverleaf from another directory,
copy that file into the current working directory. By default, the data size is 64x64x64 and
the simulation will run for 200 cycles. Cloverleaf will call ascent every 10 cycles.
In the current directory create an ascent_actions.yaml file with the following
contents:
-
  action: "add_extracts"
  extracts:
    e1:
      type: "relay"
      params:
        path: "clover_data"
        protocol: "blueprint/mesh/hdf5"
To run clover: srun -n 1 path_to_clover/cloverleaf3d_par. Your MPI may be different, so
you may need to launch the MPI task with mpiexec or mpirun. After this runs,
there will be 20 files in the form clover_data.cycle_000010.root in the current
directory. Each root file points to subdirectories with HDF5 files that contain
the mesh data for each cycle.
Before the next step, we will create a file that contains information about all the root files.
ls full_path_to_the_cwd/*.root > clover_cycles will create a text file with all the root files.
While we can use replay on an individual root file, we will uses all time steps to see the results of
actions over multiple time steps. Note: its important to include the full path when creating
this file. This allows you to use the clover_cycles file anywhere on the file system.
Actions Templates
Now that we have data, we can begin to develop an actions file. It’s generally a good idea to use the our example actions Ascent Actions Examples as templates for your own actions. These templates are auto-generated from our test suite, so they should contain most capabilities.
Example Actions
We will will create an isosurface and plot it by using an example actions as a base for our new actions and adapt it for Cloverleaf.
From the example of using creating a single contour:
-
  action: "add_pipelines"
  pipelines:
    pl1:
      f1:
        type: "contour"
        params:
          field: "braid"
          iso_values: 0.0
-
  action: "add_scenes"
  scenes:
    s1:
      plots:
        p1:
          type: "pseudocolor"
          field: "radial"
          pipeline: "pl1"
      image_prefix: "tout_single_contour_3d"
The main things we have to change are the parameters of the contour filter and
the iso value. For example, Cloverleaf does not have the fields braid or radial
, so we have to enter valid fields. Ascent will tell you if a field does not
exist, and Ascent will present you with a set of known fields as alternatives.
In this case, Cloverleaf has fields like density and energy. Lets change
the field for the contour filter to density change the iso value to something
non-zero.
Changing these values we and the name of the resulting image, we end up with:
-
  action: "add_pipelines"
  pipelines:
    pl1:
      f1:
        type: "contour"
        params:
          field: "density"
          iso_values: 2.0
-
  action: "add_scenes"
  scenes:
    s1:
      plots:
        p1:
          type: "pseudocolor"
          field: "energy"
          pipeline: "pl1"
      image_prefix: "my_image"
Writing Valid Yaml
The yaml format is human readable, but it can still be easy to make mistakes. Ascent will tell you about yaml parsing errors, but using external validation tools like https://www.yamllint.com/ or https://yamline.com/validator/ helps filter out simple mistakes. You can simply paste your yaml into the site and validate if the syntax is correct.
Running Replay
We have created an actions file and now we want to run it.
We have two choices: use the mpi version ascent_replay_mpi or the serial
version ascent_replay. What you use depends on the data set, but since our
sample data size is small, the serial version will work just fine.
Our goal here is to test the actions we created above and validate that
they work as expected. Here we assume that the clover_cycles file and the
yaml actions file is called ascent_actions.yaml.
./ascent_replay --cycles=clover_cycles --actions=ascent_actions.yaml
The result produces 20 images, but Ascent emits warnings:
s1/p1 pseudocolor plot yielded no data, i.e., no cells remain
This means that an iso value didn’t produce any contours. There are three things we can do to fix this.
Use the levels option in the contour filter to automatically pick isovalues
Use our knowledge of the simulation input to choose a better value.
Open the data in VisIt and choose a better iso value.
In this case, we can look at the input deck (clover.in) and see that
the max value of density is 2.0. We can then alter the actions to choose
a isovalue of 1.0 and try again.
This time Ascent does not complain, and gives us non-blank images. Here is one:
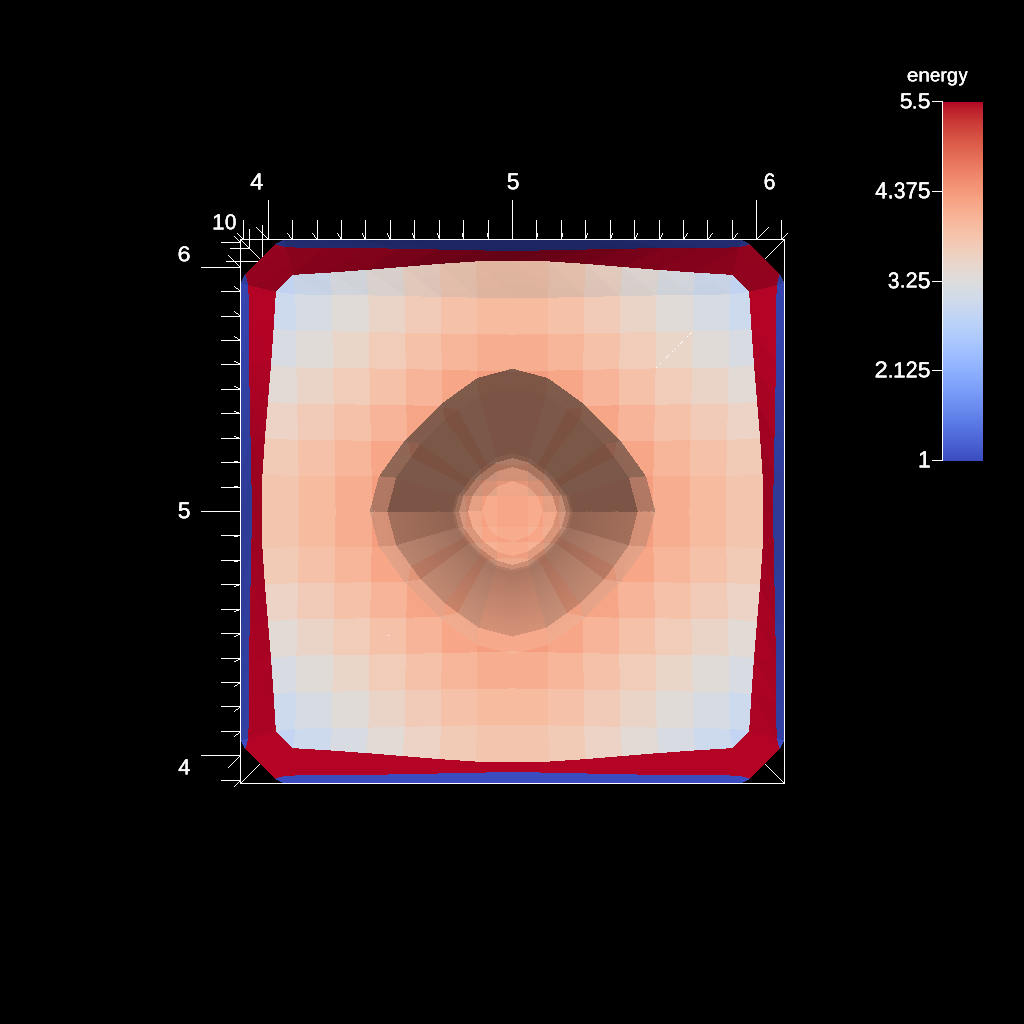
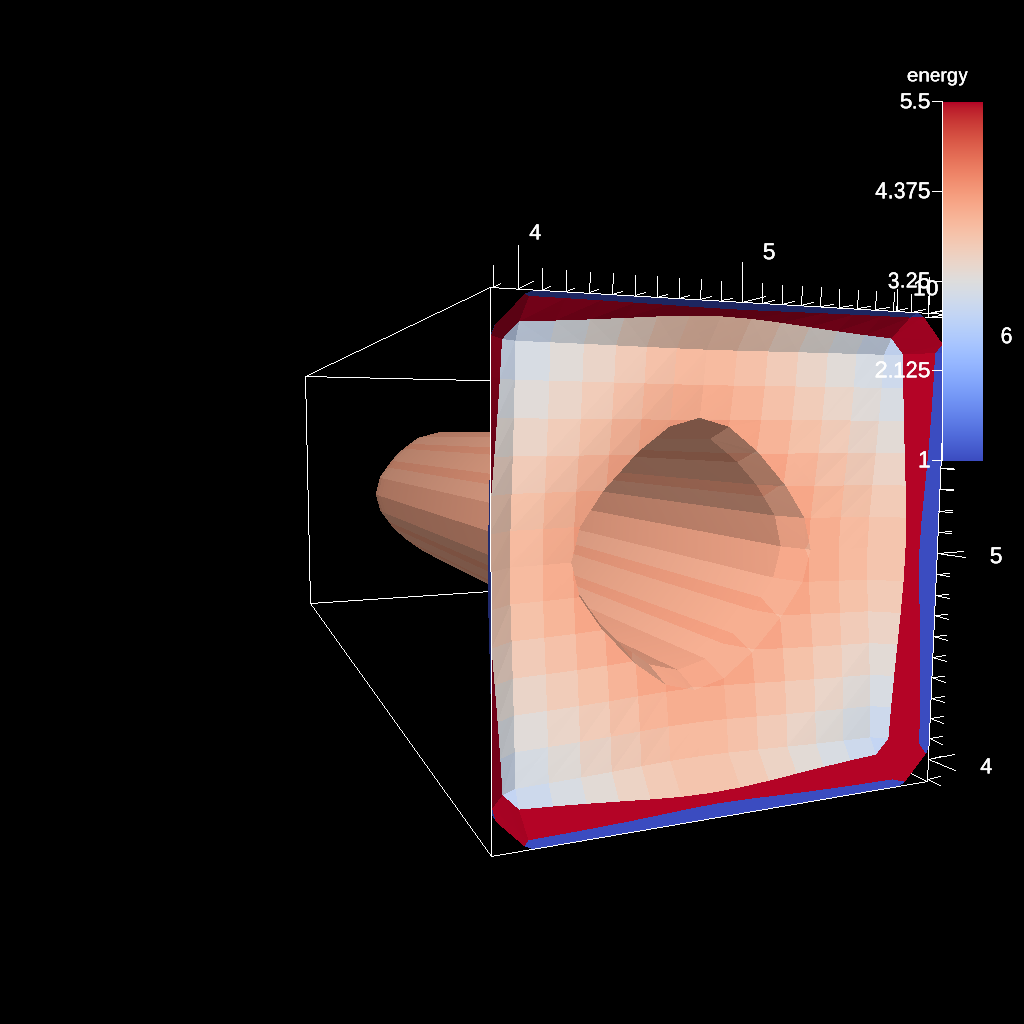
We can still do better. Ascent creates a default camera, and we can use basic camera
controls to get a better image. azimuth (move around the equator)
and elevation (move towards the polls) allow us to move the camera
around the default position.
-
  action: "add_pipelines"
  pipelines:
    pl1:
      f1:
        type: "contour"
        params:
          field: "density"
          iso_values: 2.0
-
  action: "add_scenes"
  scenes:
    s1:
      plots:
        p1:
          type: "pseudocolor"
          field: "energy"
          pipeline: "pl1"
      renders:
        my_image_1:
          camera:
            azimuth: -20
            elevation: 5
          image_prefix: "my_cooler_image"
Generate Spack Environment Script
The uberenv spack-based build installs libraries into
difficult to locate paths. The gen_spack_env_script.py is a utility program that
searches the uberenv build for user specified dependencies and creates a shell script that
loads these locations into your path.
Why Do I Need This?
Even with a shared library build where dependent library locations are found automatically, some dependencies such as MPI and Python need to be loaded into the user environment for Ascent to execute successfully.
For example, if the uberenv built MPI and the user’s machine
also contains an installation of MPI, executing a command such as mpirun -np 4 cloverleaf_par
will most definitely invoke the system MPI and not the MPI that Ascent was built with.
Mixing MPI versions or implementation will almost never result in successful execution and
should be avoided at all costs.
How Do I Use It?
From the top level Ascent directory (i.e., the root of the repository)
python scripts/gen_spack_env_script.py mpi conduit python
Simply invoke the script with python followed by a list of packages. In the above example,
we are asking the program to generate a shell script called s_env.sh to load the paths of mpi, conduit,
and python into our environment. Once this command executes, source the shell script to
your path:
source s_env.sh
To verify success, you can echo your path and the paths of the libraries should appear at the front of the path.